Track Your First Meeting
Once you've installed the Chrome extension or Workspace add-on, tracking your first meeting takes no setup. Join a Google Meet, and AttendKit records every participant's name, join time, leave time, and duration automatically. Here's what to expect before, during, and after a meeting.
Before the Meeting
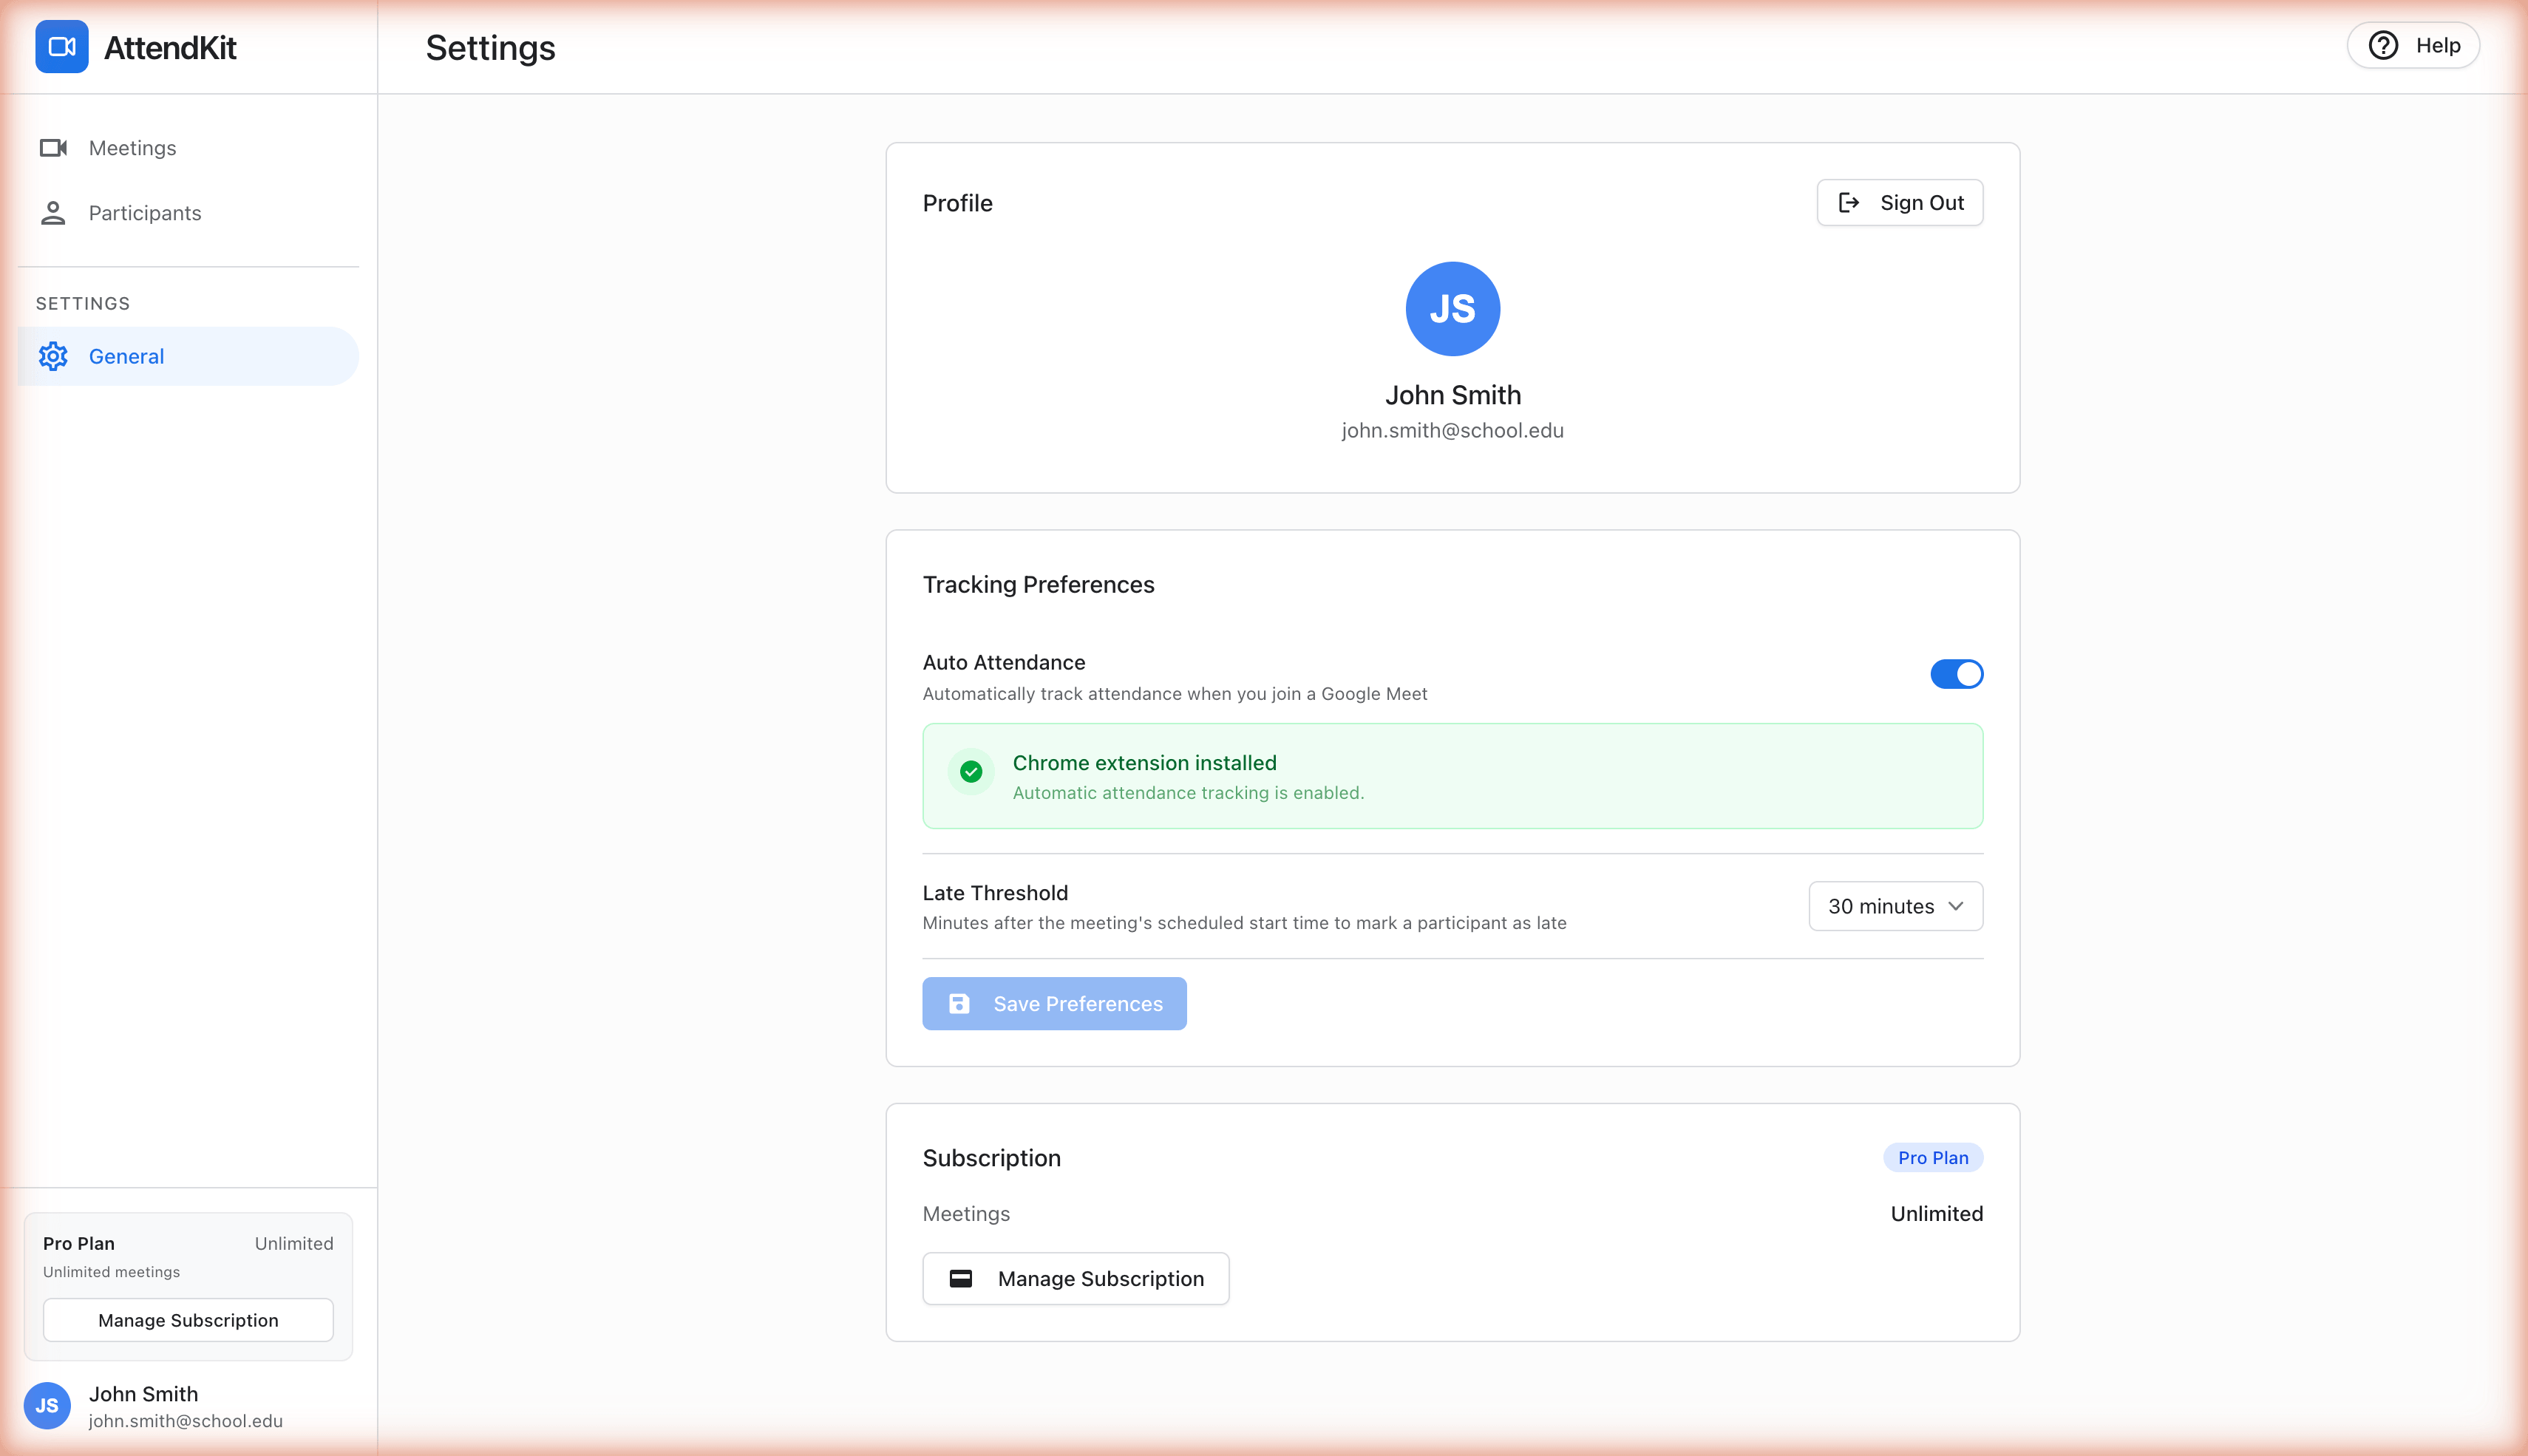
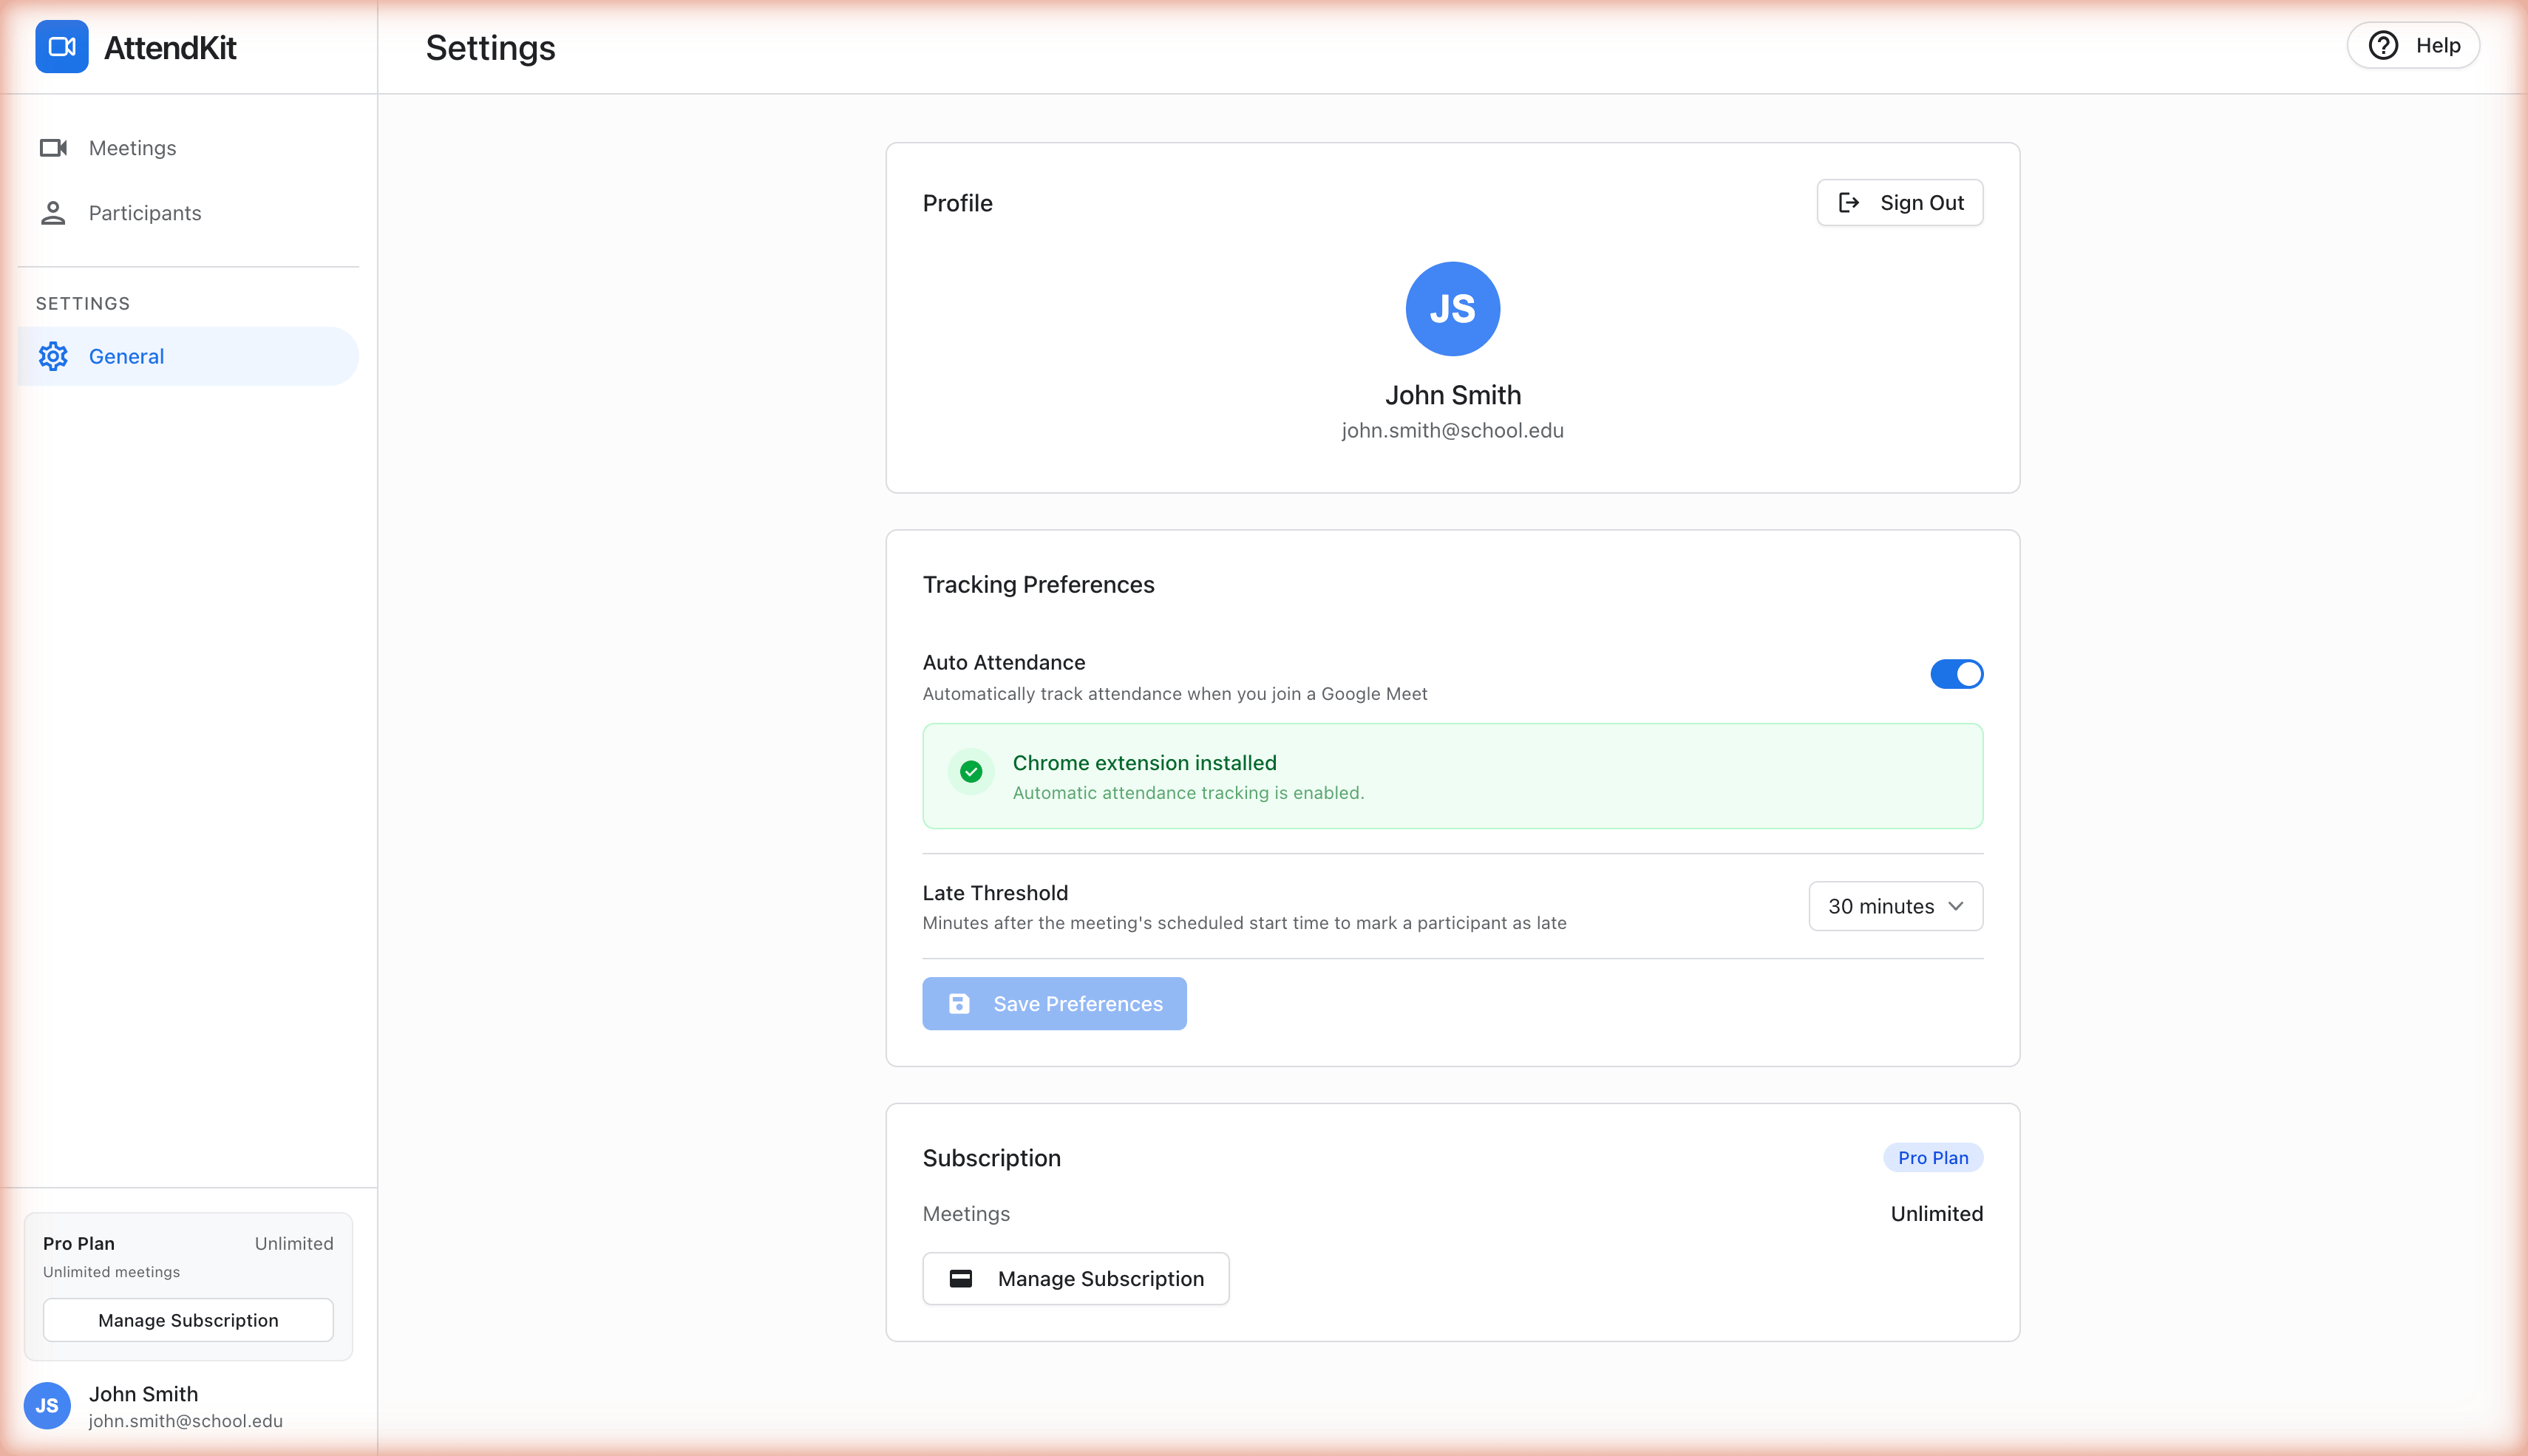
Make sure you're signed in to AttendKit and have either the Chrome extension or Workspace add-on set up. If you're using the Chrome extension, toggle Auto Attendance ON in your Settings page. If you're using the Workspace add-on, no extra setup is needed. You'll start tracking by opening the add-on during the meeting.
During the Meeting
With the Chrome extension: Tracking starts automatically when you join a Google Meet. Nothing to press.
With the Workspace add-on: Once you're in a Google Meet call, open the AttendKit add-on from the side panel to start tracking. You can close the panel after tracking begins. It continues running until the meeting ends.
In both cases, AttendKit captures:
- Participant names and emails the moment each person joins
- Exact join and leave times for every participant
- Re-joins if someone disconnects and comes back
- Duration calculated automatically
- Attendance percentage for each participant
After the Meeting
Once the meeting ends, the data syncs automatically to your dashboard. No export step, no save button.
Finding Your Report
Open your Meetings page. Your meeting appears as a card showing the meeting name, time, duration, attendance percentage, and participant count.

Click any meeting to open its detail page.
What the Report Shows
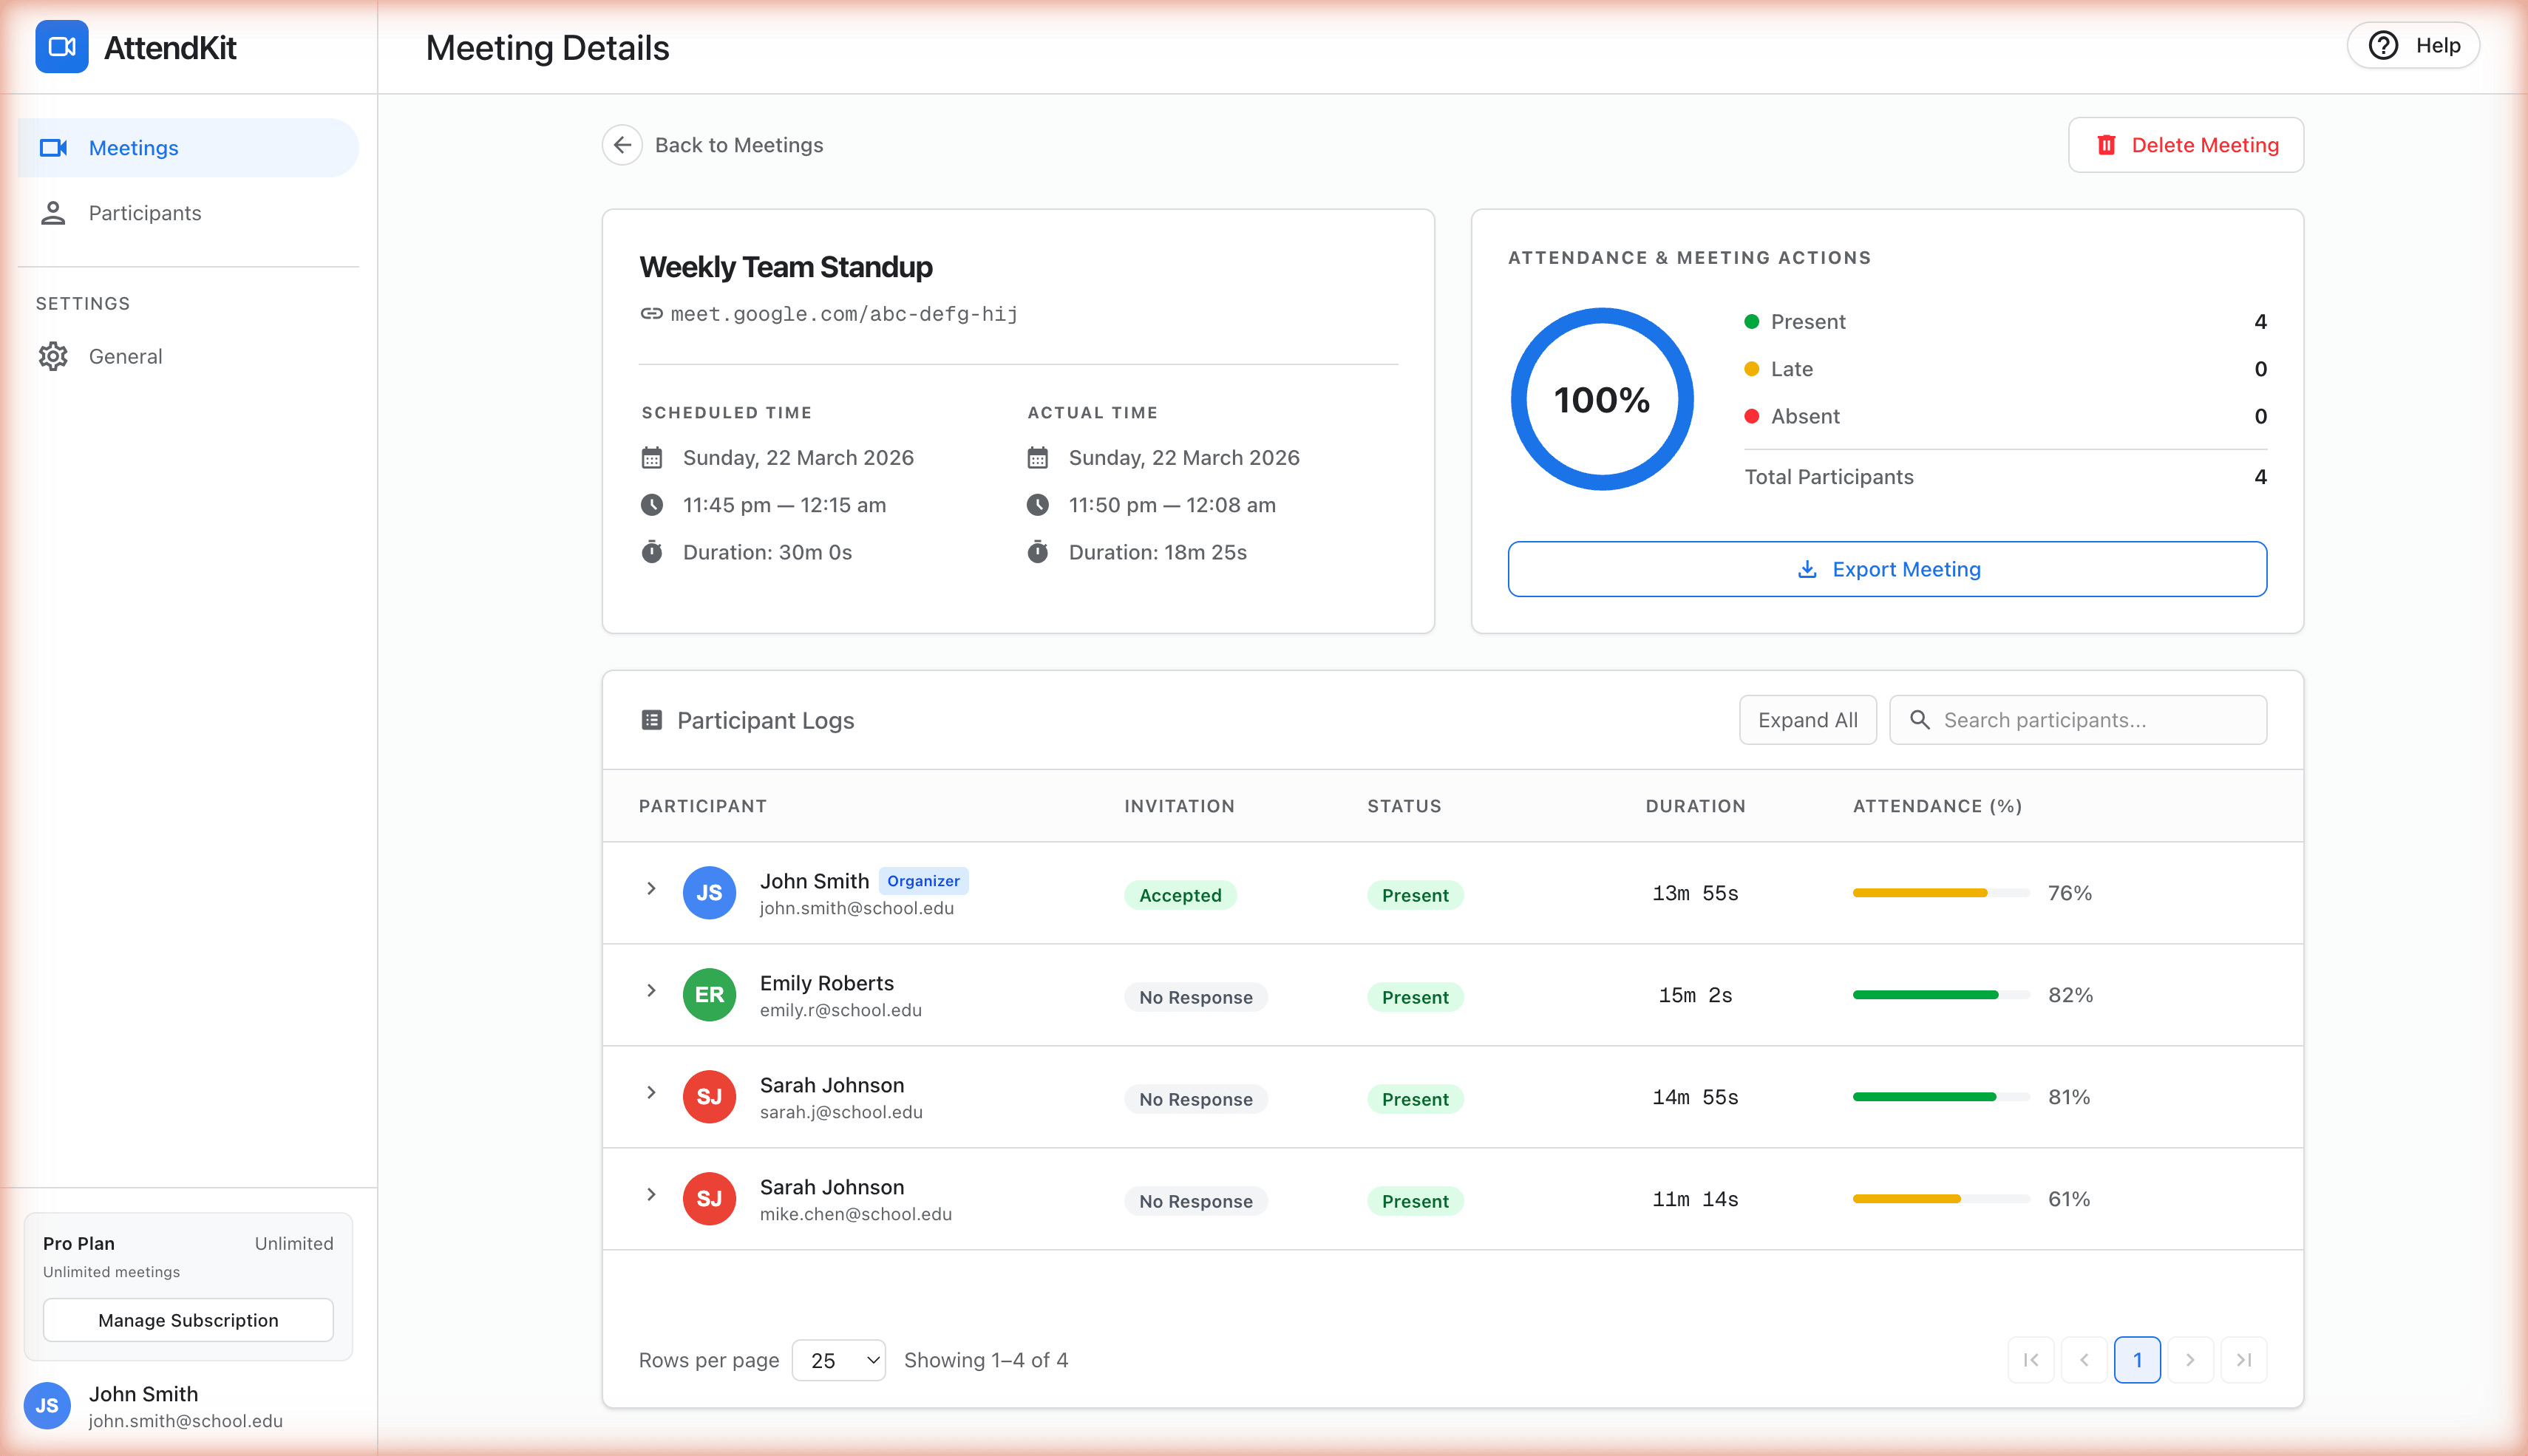
The detail page includes:
- Meeting info. Name, Meet link, scheduled vs actual start and end time. This comparison helps you spot meetings that consistently start late or run over.
- Attendance summary. A donut chart showing the overall attendance percentage and counts for Present, Late, and Absent participants.
- Participant logs. Every person listed with their invitation status, attendance status (Present/Late/Absent), duration, and attendance percentage with a visual progress bar.
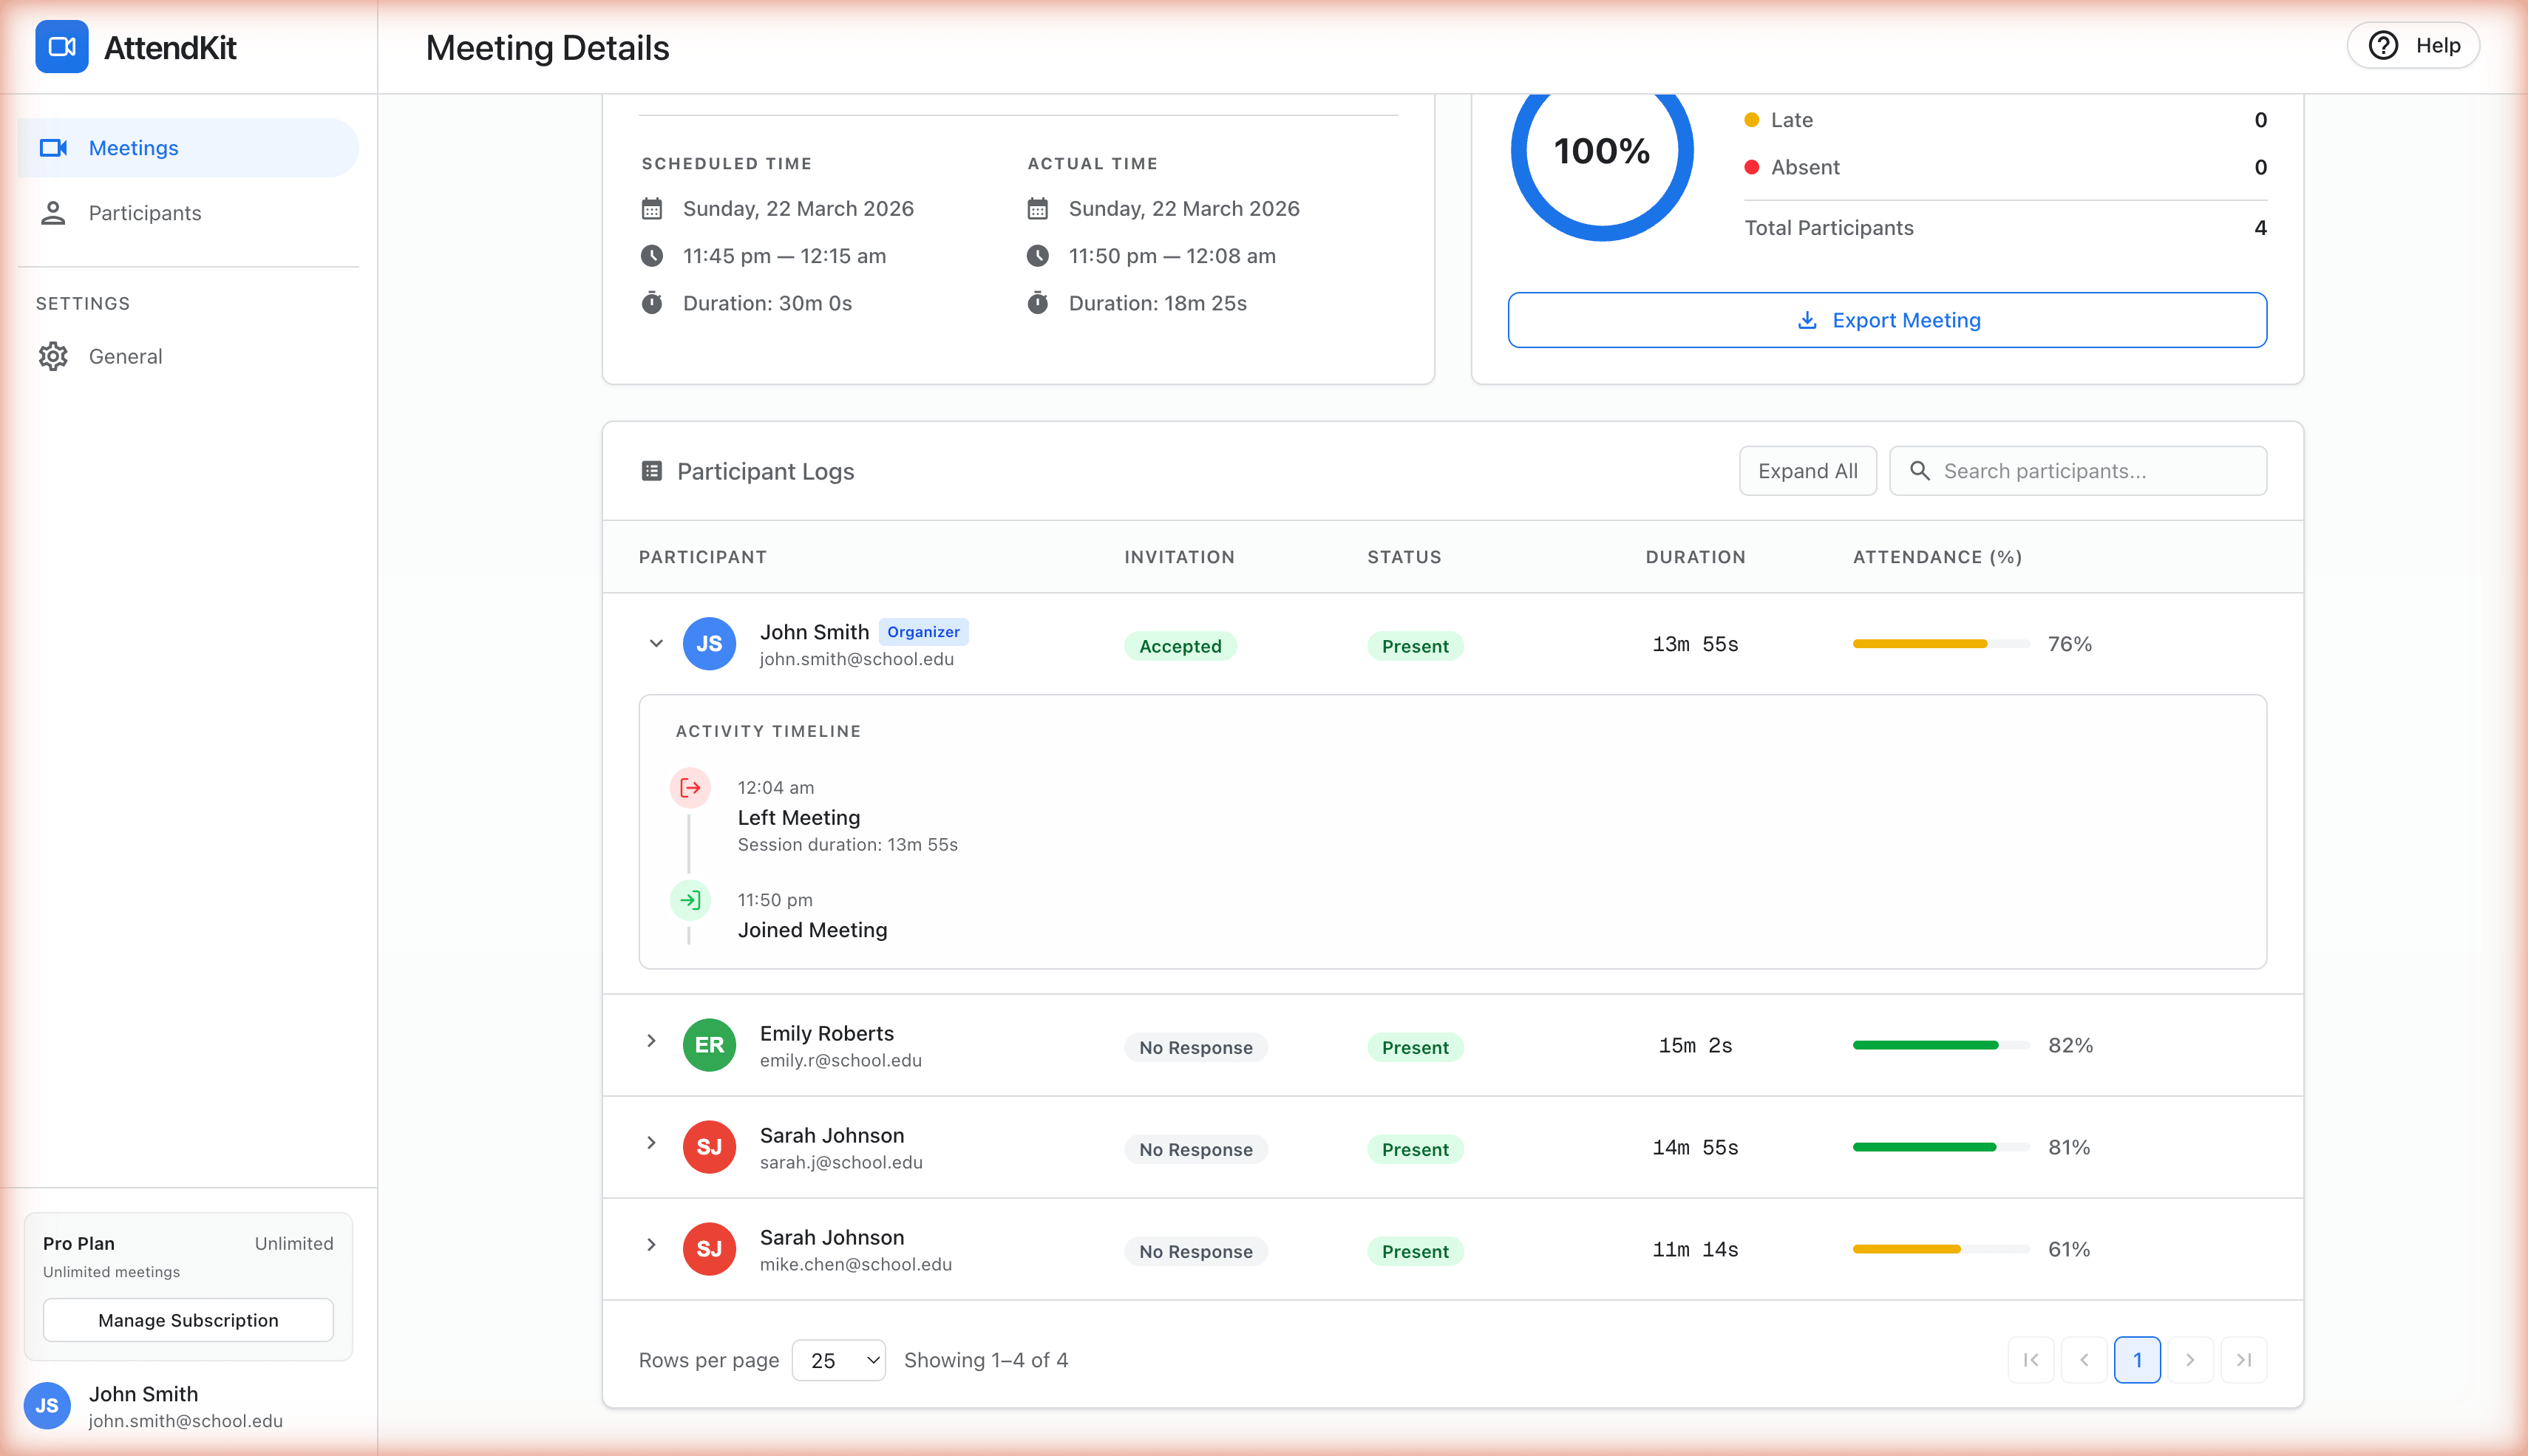
Activity Timeline
Click the expand arrow on any participant row to see their full activity timeline. This shows every join and leave event with exact timestamps. Useful for spotting connectivity issues or participants who left and came back.
Understanding Present, Late, and Absent
AttendKit assigns a status to each participant based on the late threshold setting:
- Present means they joined within the late threshold window after the scheduled start time
- Late means they joined after the threshold had passed
- Absent means they were invited via Google Calendar but never joined the meeting
How the Late Threshold Works
The late threshold is a number of minutes measured from the scheduled meeting start time. The default is 5 minutes.
Example: Meeting scheduled for 10:00 AM, late threshold set to 5 minutes:
Changing the Late Threshold
Go to Settings, find the Late Threshold dropdown under Tracking Preferences, and select your preferred value (1 to 30 minutes). Click Save Preferences.
A tight threshold (2-3 minutes) works for strict environments like exams. A relaxed threshold (10-15 minutes) works for casual standups where people trickle in.
Changing the threshold only affects future meetings. Your existing data stays as it was.